Guide
How to make a tattoo stencil
A stencil is the map you and the client agreed on, printed at the size you will tattoo. Photo Tattoo Stencil makes the black lines in the browser. You still crop, edit, print, and transfer.
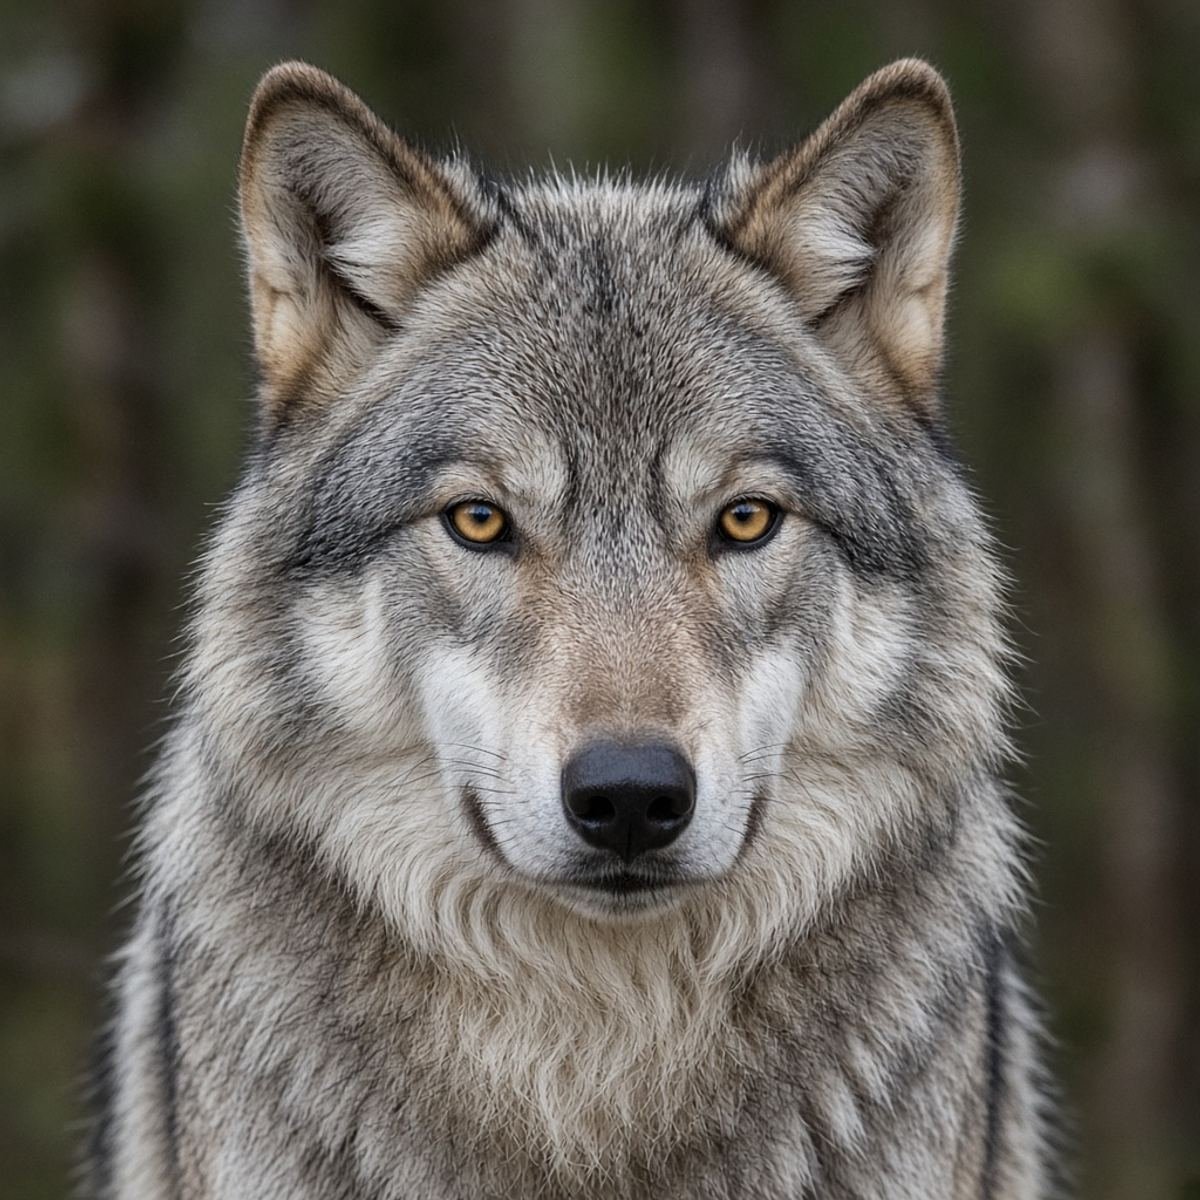
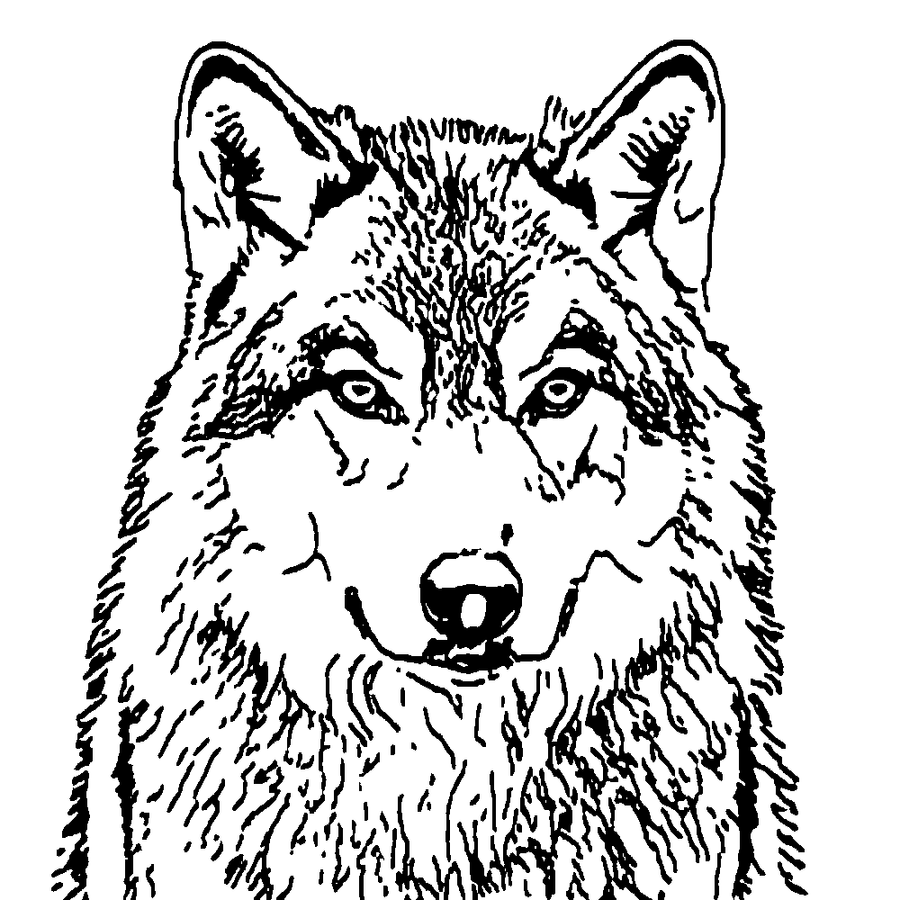
The same wolf the home page uses. Outline kept the face. It did not keep every hair. That is the result you should expect from a client animal photo, before you delete anything else by hand.
What you are making
You are making a black drawing a transfer can pick up. Gray, color, and soft shading do not belong on that sheet if the printer is thermal. They burn as a blot or they do not print. Photo Tattoo Stencil forces black or white for that reason. If you want tone, you still draw the hatching. That mode is not in the tool.
1. Rights before pixels
Client photos of their own body, a drawing they made, or a design you drew are the straightforward cases. A picture from a search, a celebrity portrait, or another artist flash is a rights problem before it is a tracing problem. The tool will trace whatever you give it. The terms say the same thing without the shop phrasing.
2. Crop like you mean the tattoo
The tracer follows contrast. A door frame, a hat, a watermark, and a second person can all become lines. Crop until the subject fills the frame. Straighten a tilted face. Background removal in the tool only helps when one flat color touches the edges. A street or a garden is left alone, and the note says so. Crop is the real fix. The rose sample on the site is the cautionary one: the bloom traced, and so did the leaves. Shorter notes: wolf, skull, rose.
3. Outline first, Standard only on purpose
Outline keeps the main forms: head, petal rims, the body of a snake, the beak. Standard keeps more interior lines. Start with Outline on portraits, fur, and anything shot in a room. Switch to Standard when one mark you need is missing, not when you want the machine to design the piece.
Detail runs from cleaner to busier. High detail on a soft photo does not add truth. It adds grain and shadow edges. If the stencil looks hairy, lower the detail before you spend the afternoon erasing. A drawing that is already ink on paper is cleaned, not redrawn, so a sketch does not grow a second outline.
4. Thickness is a printer problem
A line that is elegant on a phone can fail to burn. Use the middle of the thickness range, print a scrap at the real width, and look at the thinnest line you intend to follow with a needle. You can tattoo finer than the stencil. You cannot tattoo a line that never landed on the skin. Fine line clients need this conversation before the appointment, not during it. The fine line guide stays on that point.
Breaks usually mean the photo edge was soft. Close an important gap by thickening that area or drawing the missing inch. Do not keep raising detail until the background joins the subject.
5. Mirror only when the sheet flips
Thermal transfer flips onto the skin, so direction matters for a face turned to one side, a one-sided object, and any lettering. A symmetrical flower often does not care. Mirror is off by default so a design is not silently reversed. Turn it on when you know the process flips. Read a word on the print. If it would read backwards on the body, you mirrored the wrong way.
6. Print the width you said out loud
Set inches or centimetres in the tool. Pick Letter or A4 to match the tray. Download the PDF and print at 100 percent. Fit to page and shrink to printable area change the size even when the file is right. Measure with a ruler. If it is off, the printer dialog is the first place to look.
Two or four copies are a spare, not a design change. They stay at the width you set unless you ask to shrink them onto one sheet, and the tool tells you the new width before the download. A design bigger than the page is tiled with a small overlap instead of being scaled in secret. More of the PDF behavior is on the print-first page.
7. Black only, on the paper that machine expects
If you move the PNG into another app, do not recompress it into a JPEG with gray fringes and then send that to a thermal unit. The PDF from Photo Tattoo Stencil embeds lossless black and white so that step is already done. Your ribbon, roll, and driver still have to match the unit. Household paper is not a stand-in. Invert is for looking at the drawing. Leave it off for the print or you burn a black field. The printer guide and the paper guide refuse to invent prices or model speeds.
8. Transfer with the product you already trust
Shops already have a paper and a solution they like. Use that. This is not a recipe for a specific chemical and it is not medical advice. The usual shape of the step is: skin clean and dry, product applied the way that bottle says, stencil placed without sliding, a moment to set, then a mirror check with the client before anyone starts. If the transfer smears, use the spare copy. Do not guess a new size on the skin.
9. When to throw the print out
- The photo is too soft and the outline is a dashed guess.
- Lettering came through warped. Redraw the letters.
- A compass, circle, or banner is bumpy because the photo had glare.
- The background is tangled into the subject and cropping did not save it.
- The client changed the size after you printed. Reprint.
A stencil you do not trust costs more time on the skin than drawing the lines again at the desk. If you are out of transfer paper entirely, the honest options are in the no-paper guide.
Questions
Do I mirror every stencil?
Mirror when the transfer flips the sheet onto the skin, which is the usual thermal path. Leave it off if the print is only a reference beside the body. Read any word on the paper before you commit.
What thickness should I start with?
The middle of the slider, then a scrap print at the real width. If the thinnest line you care about breaks, go thicker or redraw that line. A crisp phone screen is not a thermal test.
The trace is too busy. What now?
Lower detail or go back to Outline. Crop tighter and run it again. Delete anything you would not tattoo. The tool does not know the design.
Does this replace transfer paper?
No. It makes the line art and a sized PDF. Getting the lines onto skin still needs your paper and machine, or one of the no-paper methods in the other guide.